
Battleplan Combined Arms: Tanks, Infantry and Engineers
Plan a Battleplan tank breakthrough with infantry follow-up, artillery and engineers. Use the release tutorial to coordinate orders and protect the corridor.
FAQ
Should infantry use the same order as tanks?
Why can’t I order a formation to clear mines?
Does this guide give an optimal army composition?
What does combined arms mean in Battleplan?
A tank breakthrough is only one part of an operation. The release tutorial uses infantry to engage defenders, reconnaissance to reveal positions, artillery to prepare the attack and engineers to handle possible mines. Armor then advances through the opening while infantry takes the ground behind it. The useful lesson is assigning connected jobs, rather than putting every formation on the same order.
This page focuses on that sequence. For selecting a formation and drawing an area, start with the drawn-orders guide; for the hierarchy behind your selection, use units and officers.
Source and scope
The example comes from perafilozof’s October 12 release tutorial, which discloses Slitherine sponsorship. We read its full transcript. It demonstrates one campaign mission and readiness-mode planning; it does not verify an optimal composition or a solution for every map. Screenshots below are from that tutorial, with links to the corresponding moments. Captions describe the visible interface; this site did not record the playthrough.
Coordinate a breakthrough in three checks
Follow these source-derived checks while comparing the selected formation and the current battlefield.
1. Give the supporting formations their jobs
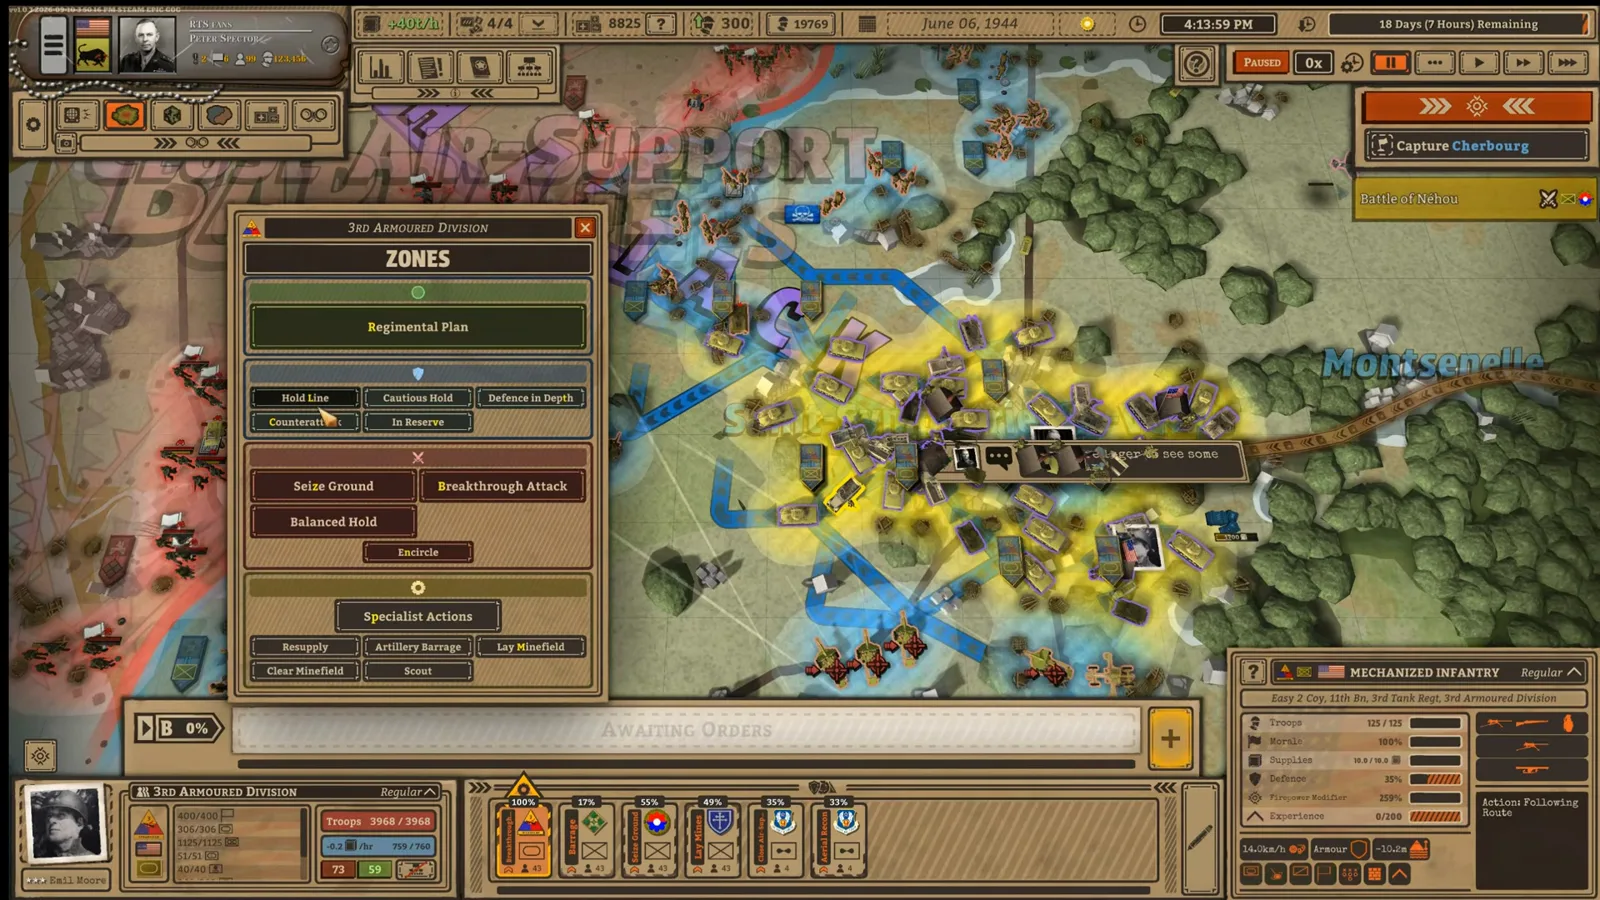
Inspect the selected formation before drawing its next task. In the tutorial, scouts enable scouting, artillery enables bombardment, and engineers enable mining or mine clearing. The creator prepares artillery and possible mine clearing on the approach used by the tank spearhead. Use the actual order menu to check capability; a missing task is a reason to inspect the formation, not evidence that every army can perform it.
2. Prepare infantry follow-up before armor advances
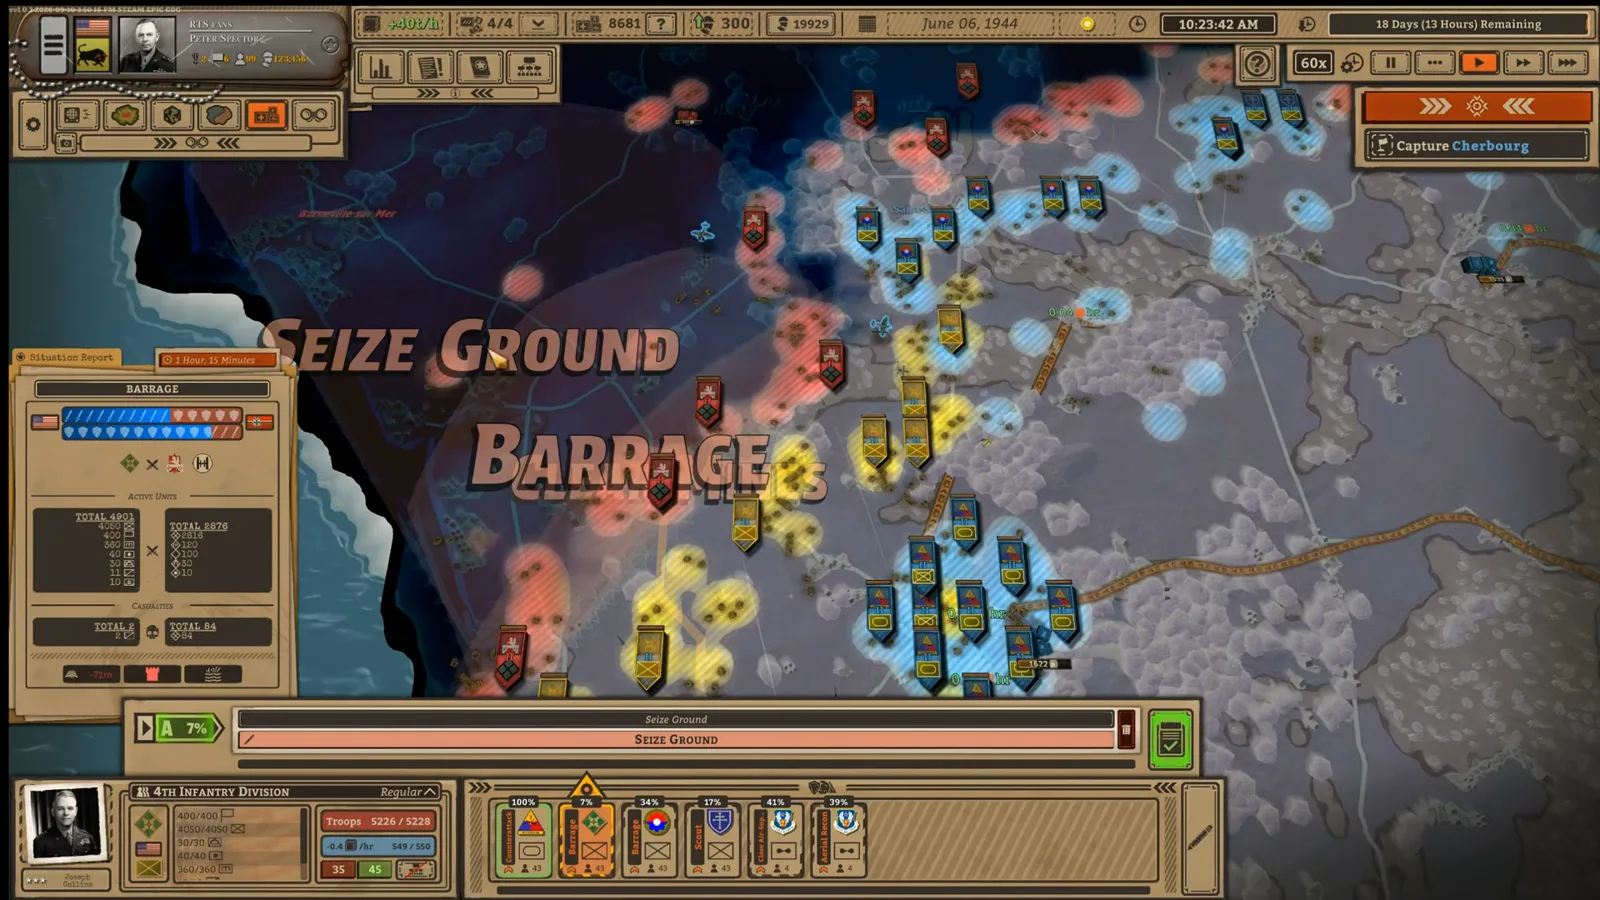
Draw the armored Breakthrough Attack and a separate Seize Ground area for infantry following behind it. At 10:53 the creator prepares the infantry’s order before the tanks finish their opening move; at 13:34–13:47 he explains clearing defenders on either side of the breakthrough line. In readiness mode, allow the follow-up to prepare while the current stage runs, then explicitly execute it when the situation fits.
3. Review the corridor before extending the spearhead
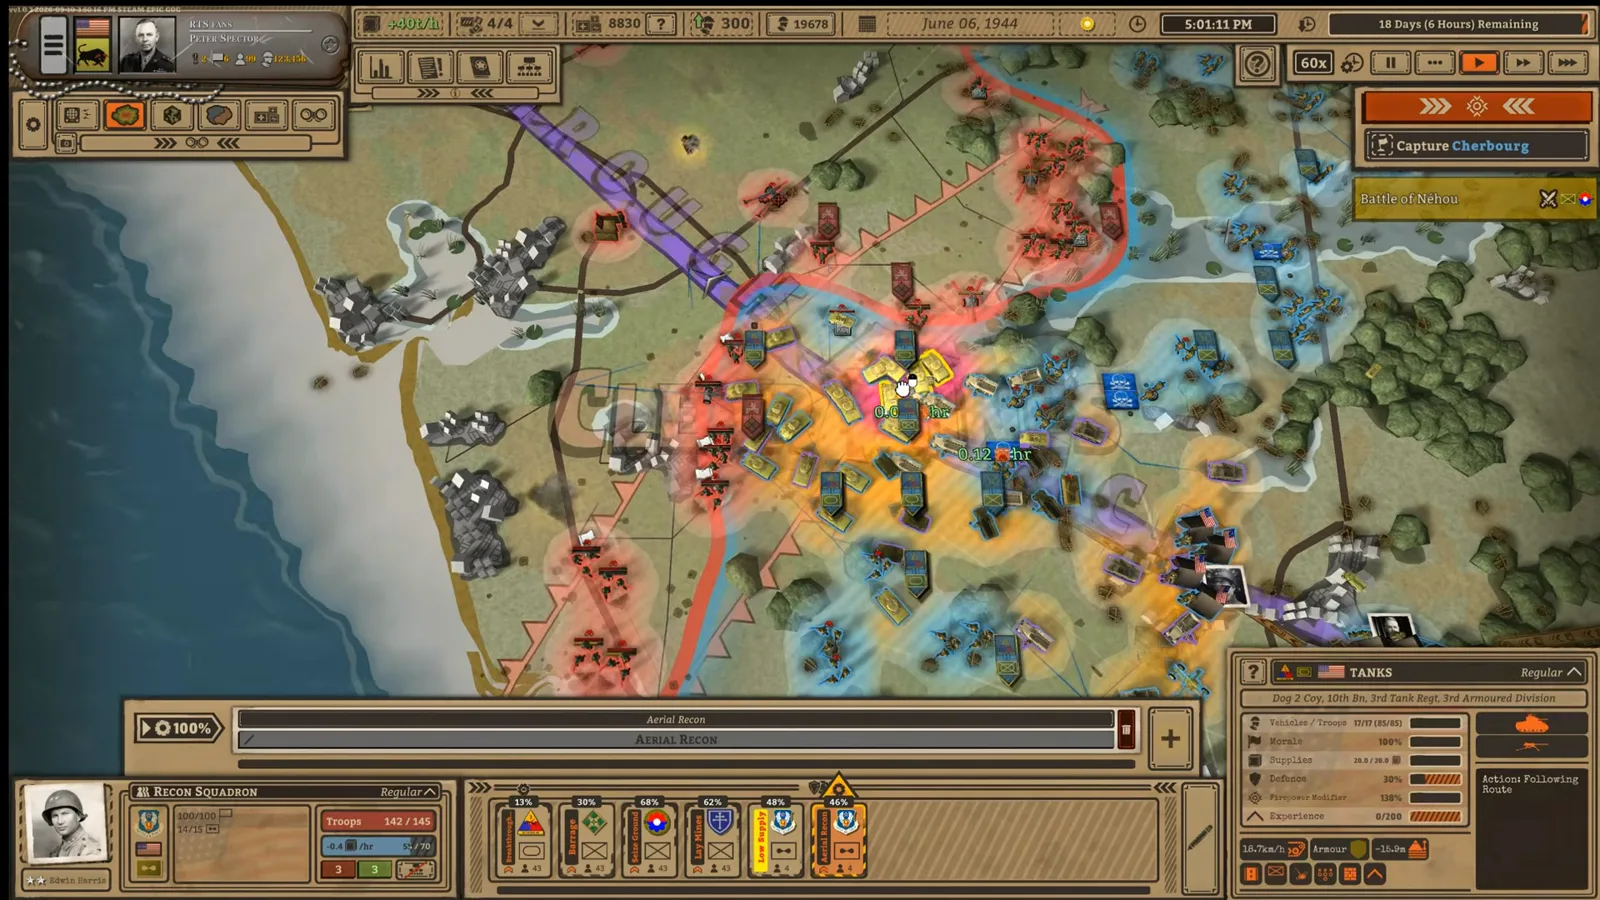
Pause after the opening move and inspect the front, remaining enemy pockets, infantry position and supply connection. The tutorial warns that isolated defenders can remain active and that fast armor can move beyond its supply lines. Prepare the next armored stage only after deciding which formation will hold or clear the ground behind it. This is a suggested review checklist, not a developer-prescribed winning route.
When the plan stops fitting the battlefield
| Observation | What to review |
|---|---|
| Tanks have moved well ahead of infantry | The follow-up area, readiness and the defenders left beside the corridor. |
| A specialist task is unavailable | The selected formation’s actual units and order menu. |
| The advance has reached a village | Supply connection and remaining defenders; the village is not automatically a usable depot. |
| Infantry is attacking a fortified position | Visible unit condition and artillery preparation, without assuming a fixed damage bonus. |
The tutorial’s armor moves quickly, but this does not establish a universal speed ratio between tanks and infantry. Terrain, orders and the particular situation still need inspection. Use supply and logistics before extending the advance, and the defensive-positions checklist when the next job is holding the newly occupied ground.
Keep air support in the same sequence
The creator gives aircraft new plans for the next offensive instead of leaving them assigned to the opening sector. Reconnaissance and close support are different jobs; neither replaces the infantry follow-up. The air reconnaissance and support guide separates those roles and the rebase check needed when support locations change.
Reviewed October 14, 2026. This is an independent explanation of cited footage, not hands-on mission testing. Gameplay recorded by perafilozof; Battleplan imagery is © Slitherine Ltd. / Foolish Mortals Games Inc. The original moments are linked beside each screenshot.
Related videos

Related Articles
Guides
Battleplan Air Recon and Support: Orders and Rebasing
Use Battleplan air reconnaissance and close support for different jobs. Follow the release tutorial’s scouting, next-sector planning and aircraft rebase checks.
Guides
Battleplan Defense Guide: Counterattack and Fortifications
Read Battleplan Counterattack orders, engineer mine tasks and fortification levels. Use a source-backed checklist to hold a sector and prepare the next move.
Guides
Battleplan Beginner Guide: First Orders and Battle (2026)
Start the 2026 Battleplan WWII game with a practical preparation checklist: tutorial missions, readiness mode, army setup, drawn orders and supply.
Was this helpful?
Thanks for the feedback!